


The Basics of Off-Road Riding
Foundational Riding Tips (Off-Road Series #2)

If you are new to off-road riding, then you’ll quickly become aware that riding away from the paved blacktop is completely different to riding on gravel and-or dirt. While the basics of pedaling any bike are similar- the differences from riding on paved to unpaved surfaces can range from mild to extreme.
Off-road terrain has a tendency to shift- slightly to significantly beneath the wheels. An off-road rider is required to navigate uneven, unpredictable surfaces. Balance, technique and awareness are crucial to riding safely and efficiently.
The marked differences are manifested in the tactile ‘feel’ a rider gets from the ground, which is very different from paved surfaces. Off-Road riding requires subtle, nuanced and sometimes significant adjustments to maintain momentum and stability.

The Basics
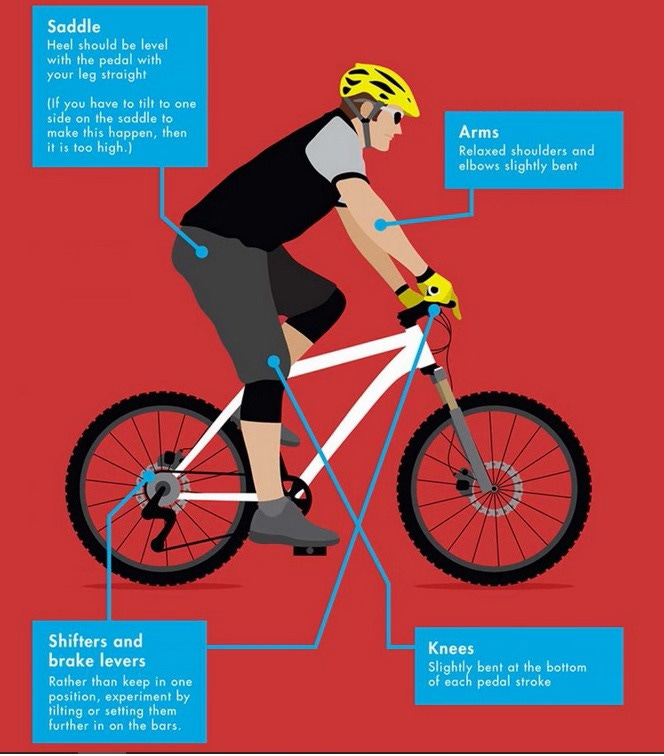
Cockpit and Controls;
The first order of business for your off-road bike is setting up the handlebars- (roll & height) then shifters and brake levers.
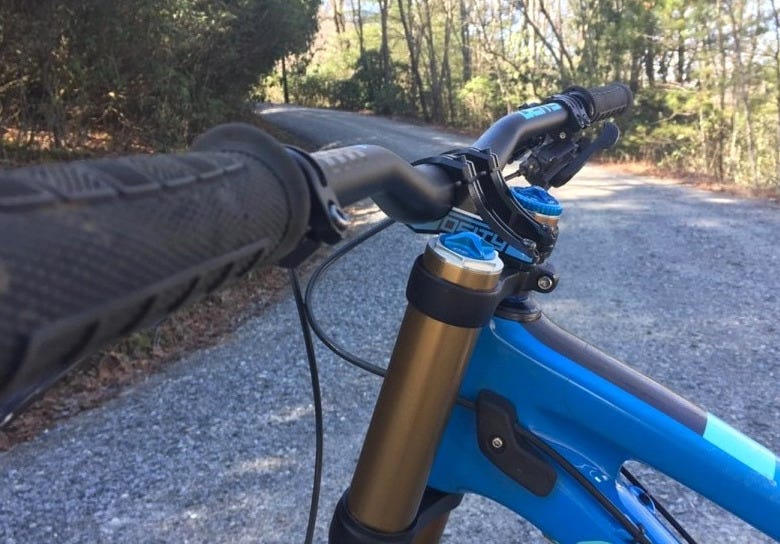
For a beginner or novice, the keyword is ‘Neutral’ -your controls should be in a reletively neutral position. This setup ensures that the rider is able to access the controls safely, without having to needlessly stress their hands and arms in un-natural positions. It also helps with implementing good, proper body position and habits.
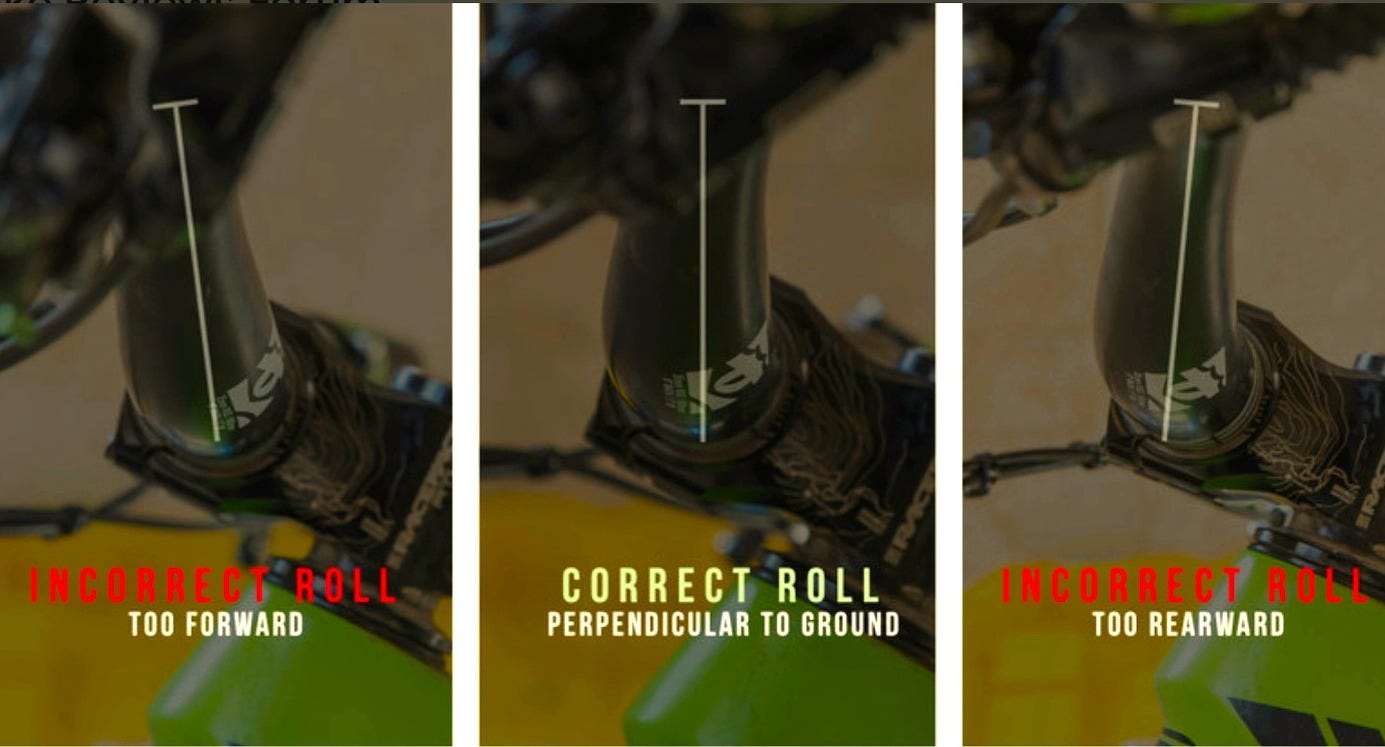
Bike bar roll should be as neutral as possible.
Bar height is another key consideration. ‘slamming’ the stem on a gravel or mountain bike is not recommended for beginners or novices- at all. Forget listening to the local ‘self-annointed’ experts… Leave the slammed stems to the XC racers. Ideally, you want your bars either even or just below the top of the saddle-1” or so below is a good starting point…
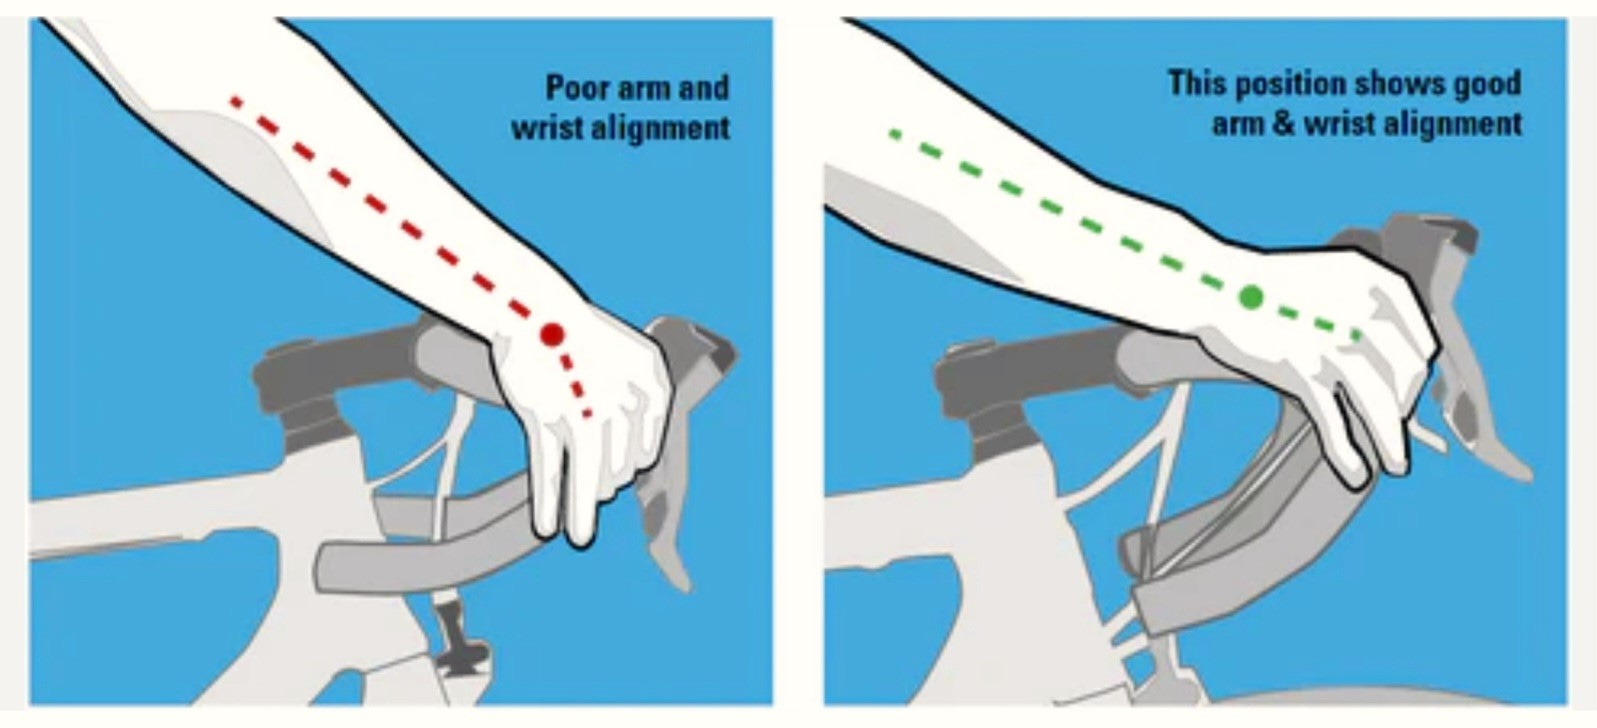
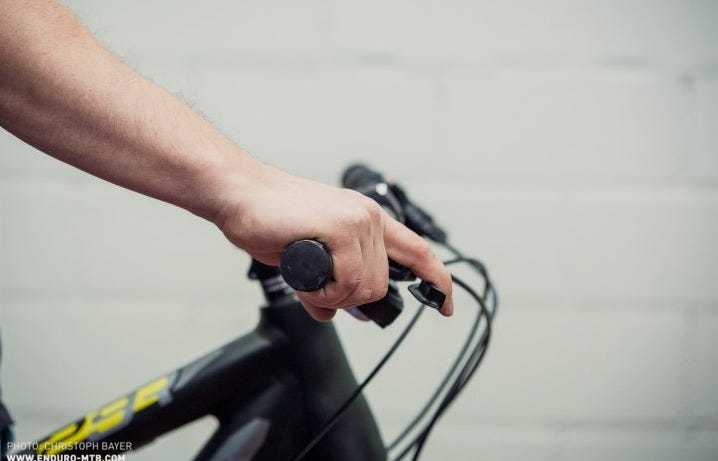
While the shifters and brake levers should basically be inline with wrists and arms.
Body Position Basics;
Off-road riding means varaible terrain and not just variable but also unpredictable. The available traction will vary even along the same trail or paths as well as the unevenness of the terrain surfaces. A change in traction
and-or the surface characteristics can catch you out in a fraction of a second.
This is why is so important to constantly be aware of your riding and the surroundings every second, every moment. The body and bike must work in concert. The bike has two parts- the front half (bars, fork and wheel) and the rear half (the saddle, cranks and the wheel) The body has two main parts (the upper body and the lower body) ALL parts must work together.
Basically, there are two acceptable riding positions- The neutral position and the ready position. Unless you are strolling along a rail trail, towpath or park path, the neutral and ready are the only proper positions.
Neutral
Ready
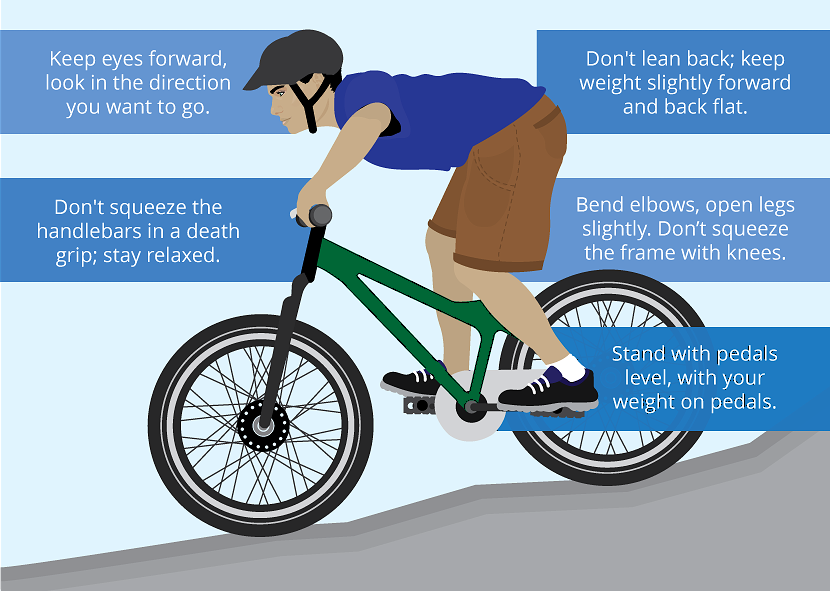
A few things to keep in mind in either position;
Always, always keep your feet and pedals level whenever you’re coasting-
3 O’clock/9 O’clock. Never in the 12 O’colock/6 O’clock position- never.Hips/Pelvic hinged and set slightly back between BB and rear wheel.
Elbows slightly up and bent.
For those who are just starting out and have come from an on-road, paved background, riding a gravel bike or an mtb like you would ride a road bike is a quick way to a dead-end in learning and progressing. Off-road riding demands the proper body position and techniques to ride safe, efficient and successful.
Practice makes for Progression;
Practicing your balance on and off the bike is a key factor for good, proper riding. Whether it is slow speed maneuvering (tight turning) or static balance (track stands) these drills will pay dividends.
What practicing will provide is a platform for neuroplasticity- a brain capable of change, capable of creating and strengthening new neural pathways under certain, given conditions. Neural circuits are utilized more often in off-road riding compared to road riding. These changes are achieved through learning to move in sync with the bike, to constantly adapt the body to the proper required positions for the conditions and terrain.

You can also practice riding up and over small curbs or a small log, this will get you used to changes in surfaces and teach you how to utilize your hip movement and forward momentum to get up or over a potential obstacle in your path.
Practice balance lines. Start out on flat painted lines and ride them for as long as you can. Work your way up to more challenging balance lines or aka- skinnies.
Practice braking, practice turning, practice pedal position and practice hip placement. Intentional, deliberate practice will yield progression. Otherwise your learning curve will take much longer and you may never progress into a safe, efficient and capable rider.